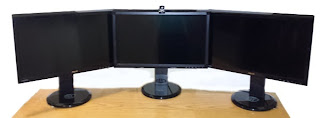
In this tutorial I shall be covering how I went about with self teaching to apply a Nividia Surround system (sorry Eyefnity)
Firstly you would need the GPUs port that could support 2 HMDI with a spare one for DVI
- ASUS z77 Sabertooth motherboard
-I5 3570K Ivy Bridge ( OCed to 4ghz)
-Corsair H100i liquid cooling (self contained no refill needed)
-2 GTX 660 3GB superclocked edition
-16 GB ram (4 sticks 4gb each)
-Phantom 410 white ATX case
-3 ASUS VG23AH 23.6" IPS monitors (60hz "reprogramed" to 72hz)
All of which I got from sales and slowly upgraded over 2 years I went with a more expensive power supply because of its ability to thin provision (saves energy thus money) and the fact that I use ALOT of periphals and USBs on the side, and cause it was on sale too.
I label both sides of my cables They wIll all be considered HDMI 1 once you've set the surround but I just make sure the center monitor (#2) is on the DVI of the first GPU with a DVI to HDMI cable so your startup is on the center display.
I have immediately dusted off my monitor when I saw this photo.
You will notice with any 3 monitor set up that there will be wedgging This can be fixed with either a $600 dollar rack or
your side displays will be angled like wings, but its far less distracting and it lines up. As you can see I also placed a strip of black electrical trap along the inside rim of the center to block out the glare, this may or may not be needed depending on the glossiness of the monitor's bezel, I left the outside rim alone because the if I had reflections on this it actually helps me adjust for alignments.
next part will be software.


No comments:
Post a Comment